-
Crochet Sparkly Nights Out Scarf
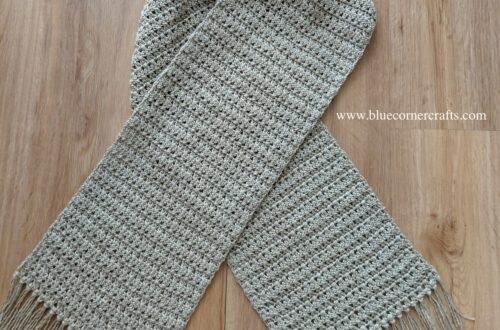
I was at my local homeware shop recently when I came across their small yarn section. Of course I had to stop and browse and the most beautiful skeins of sparkly Perfetto Lurex DK yarn by MEZ Cucirini caught my eye! There were several colours on the shelf and my mind began racing with the possibilities of what I could create with this gorgeous sparkly yarn! For a while now I had been wanting to make a fancy scarf that I could wear in winter on one of my rare nights out with friends or family. When I saw the colour Nature Gold amongst the skeins of Perfetto Lurex yarn,…
-
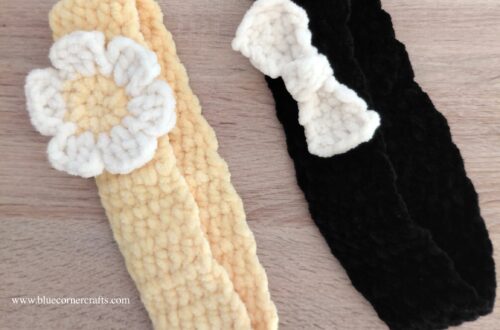
Crochet Country Headband
These Country Headbands are made with the same modern alternative to the granny stitch which I had used to make my Cosy Seasons Scarf. I had really enjoyed working up the scarf and I thought this modern granny stitch would be perfect to make a couple of quick and simple headbands! In this version of the modern granny stitch, the double crochet clusters are worked into the middle double crochet stitch of the row below, rather than into the spaces between the clusters. I used DK yarn to make these headbands – for one I used some light brown acrylic yarn from my stash (no brand this time) and also…
You May Also Like

Crochet Zebra Hot Pad
Crochet Spring Time Hot Pad
Crochet Sparkly Nights Out Scarf
-
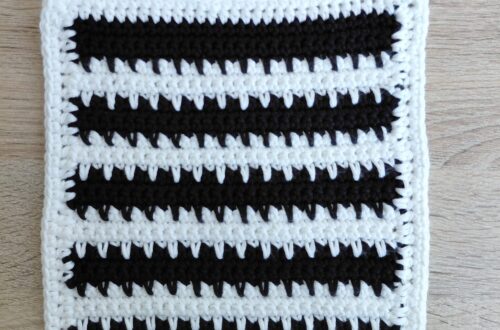
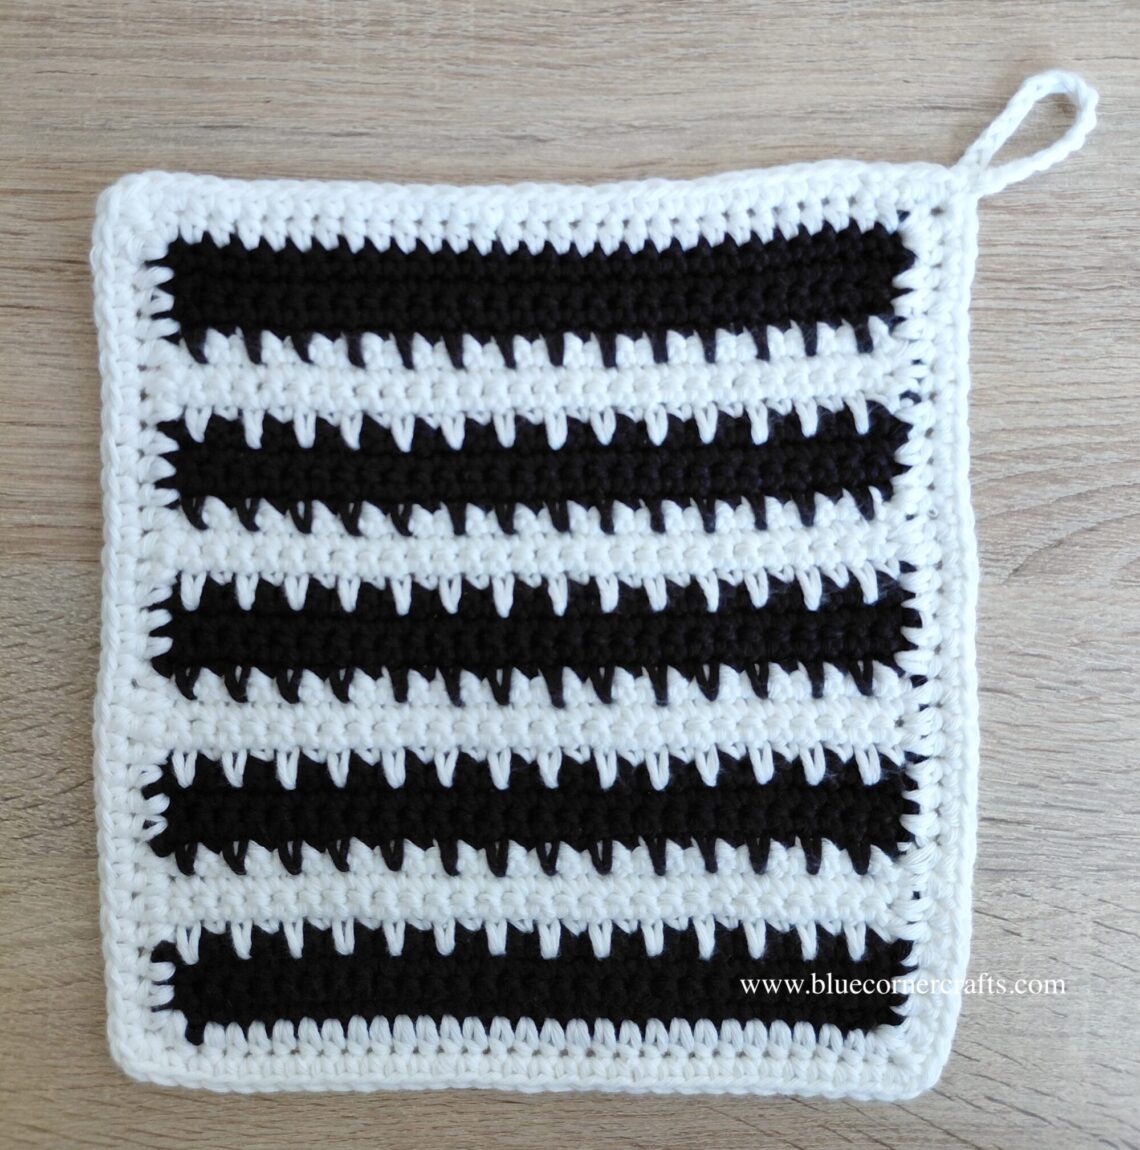
Crochet Zebra Hot Pad
The other day I was going through my stash of cotton yarn and found two skeins of Drops Paris yarn in black and white. I thought what better way to use the yarn than to make a hot pad with a zebra-inspired design! This hot pad pattern is beginner friendly as it uses only single crochet and half-double crochet stitches as well as a variation of the single crochet stitch – the spike stitch! The spike stitch is a fun and easy way to play around with colours and introduce a cute highlight in a relatively simple crochet design. Drops Paris is an aran/worsted weight cotton yarn which works up…
-
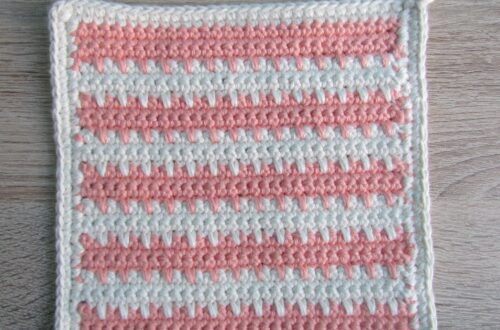
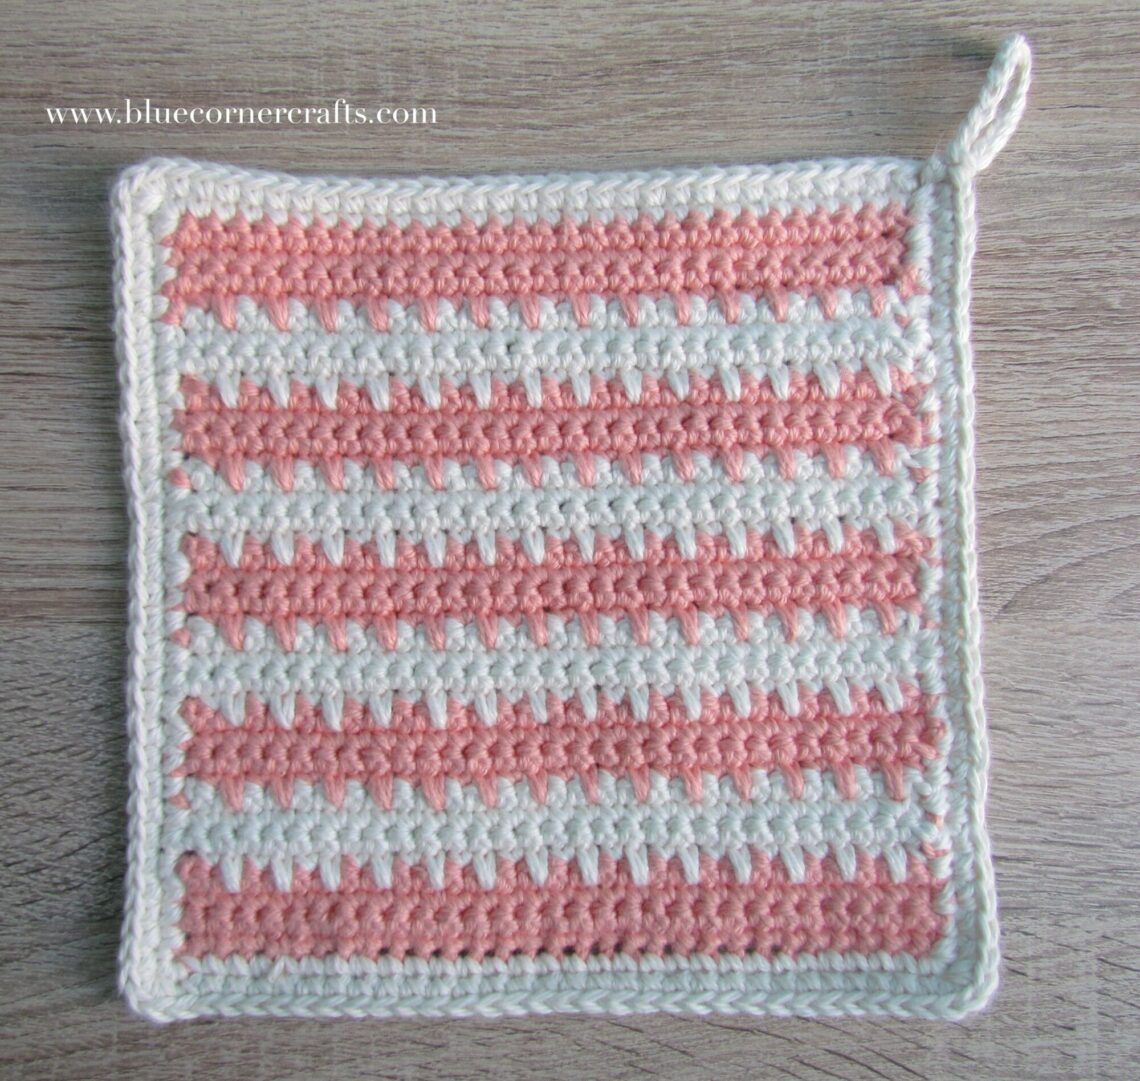
Crochet Spring Time Hot Pad
This post may contain affiliate links. If you click a link and make a purchase, I may receive a small commission (at zero additional cost to you) which helps support this blog. I only recommend yarn and craft supplies that I have used myself and love! This Spring Time Hot Pad is a fun and easy way to add some colour to your kitchen and make a useful pot holder at the same time! This crochet pattern is a simple 4 row repeat consisting of single crochet and spike stitches – perfect for beginners and more advanced crocheters alike. To make this hot pad I used two strands of King…
-
Crafty Chats #1
It’s been just over a month since I started this blog and I am genuinely humbled to see that almost everyday several people out there in the world have been taking the time to read my posts! Although this is my creative outlet and a place to share my crafty creations, I would also like it to become a more traditional community-based type of blog. More of a two way conversation, where like-minded crafty individuals can connect and share creative ideas and inspire each other! Hence the name of this post – Crafty Chats! I intend for this to be an ongoing series of posts where I share my thoughts…
-
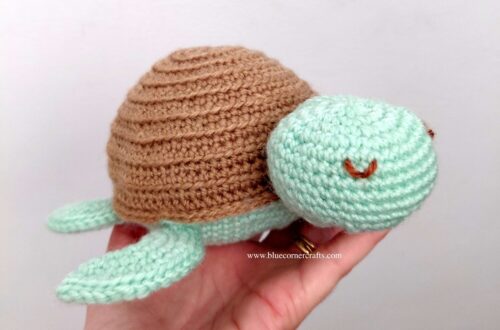
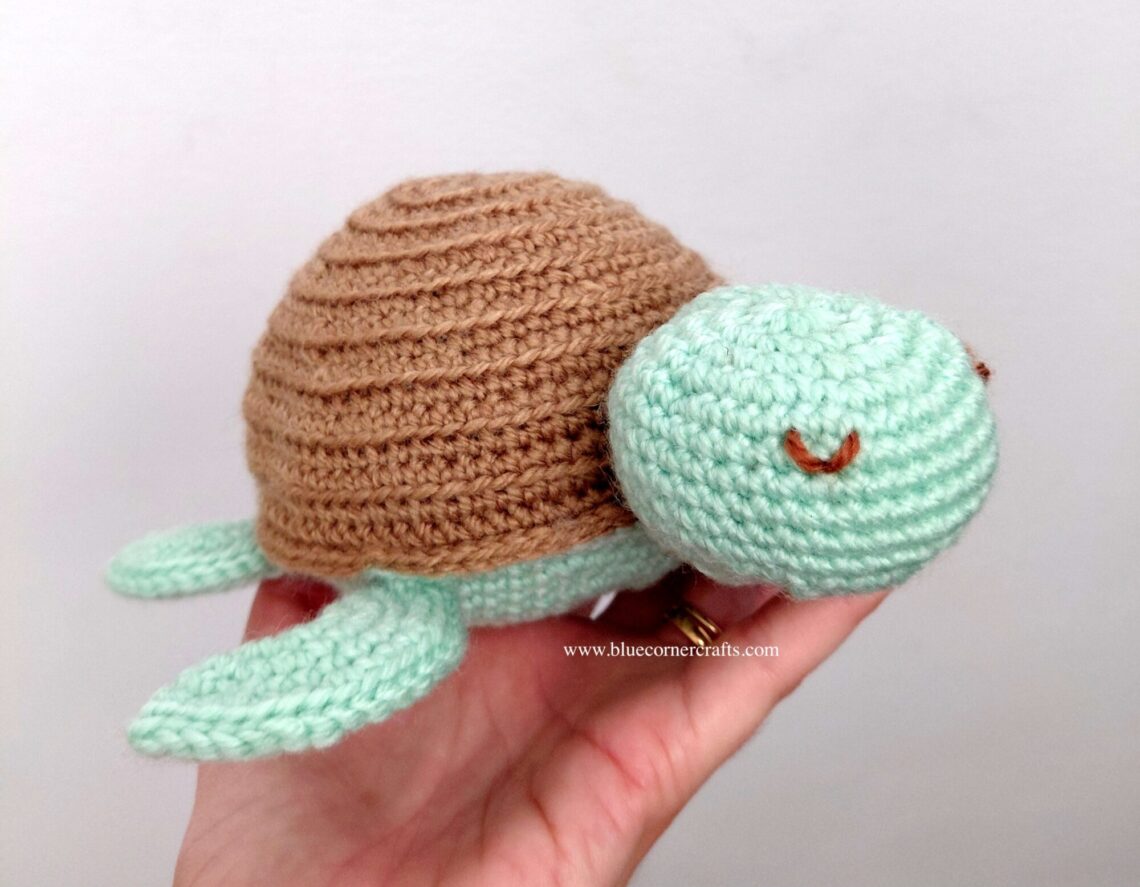
Crochet Sleepy Turtle
Introducing the Sleepy Turtle! I made this cute marine amigurumi as a birthday gift for a cute little boy who loves turtles 🙂 This pattern is beginner friendly and can be worked up quite quickly! I used a DK acrylic yarn to make Sleepy Turtle – unfortunately I don’t have a specific brand to share this time but any DK weight acrylic or even cotton yarn should work for this project. You could even use yarn of larger or smaller weight and adjust your hook size accordingly. Just bare in mind that the size of your turtle will vary too! Before gifting this cute turtle I completely forgot to measure…
-
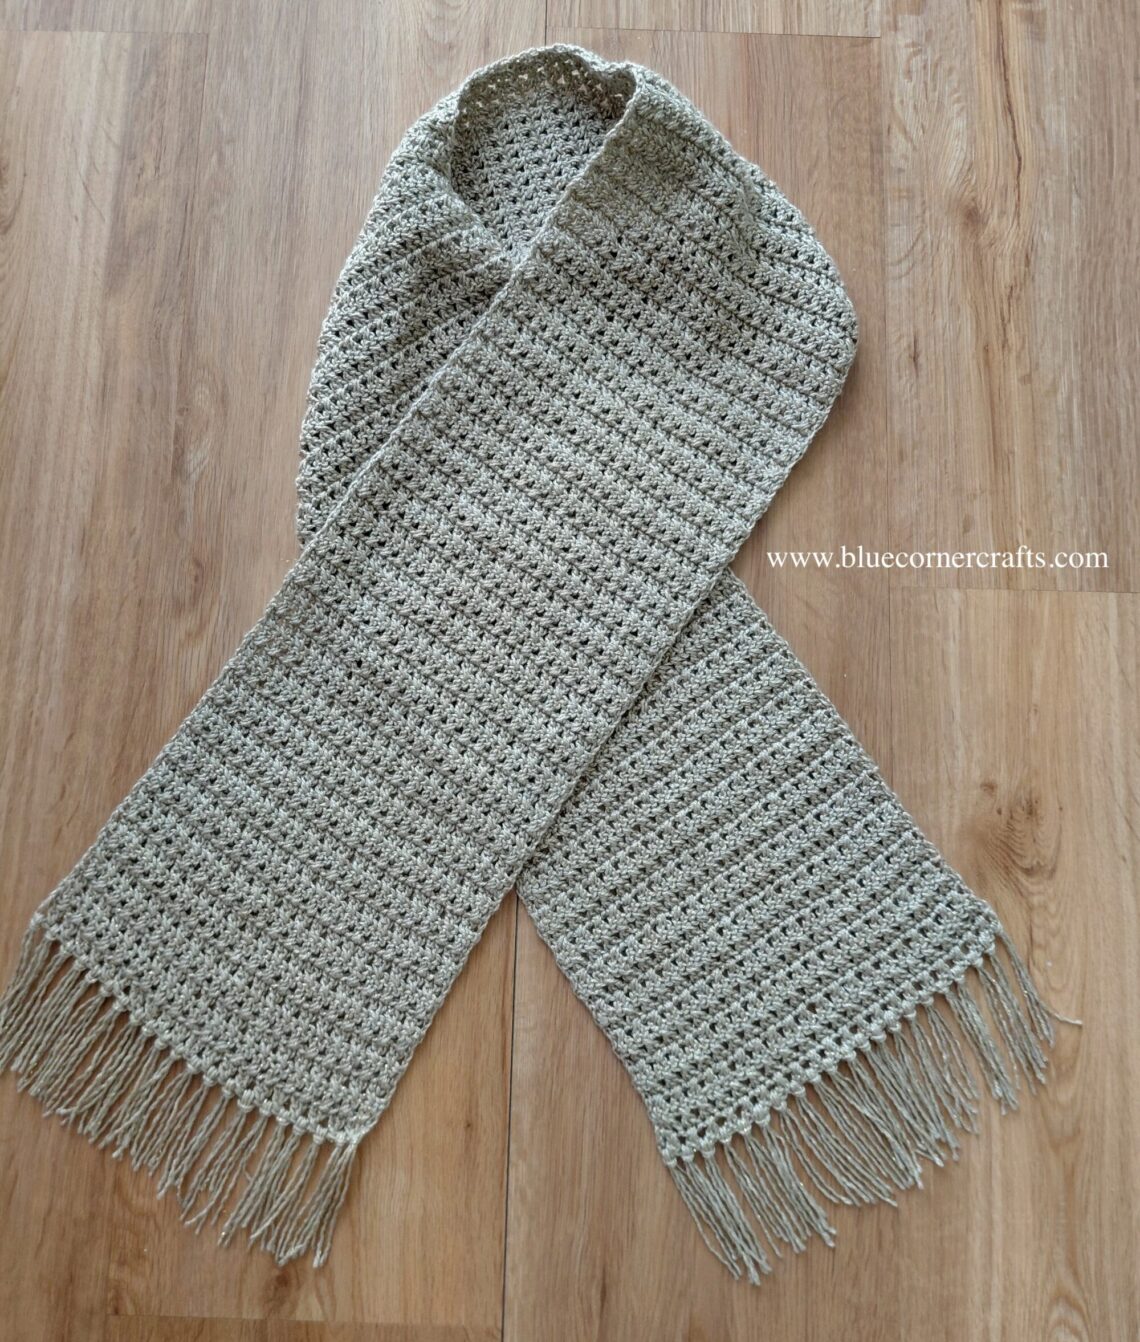
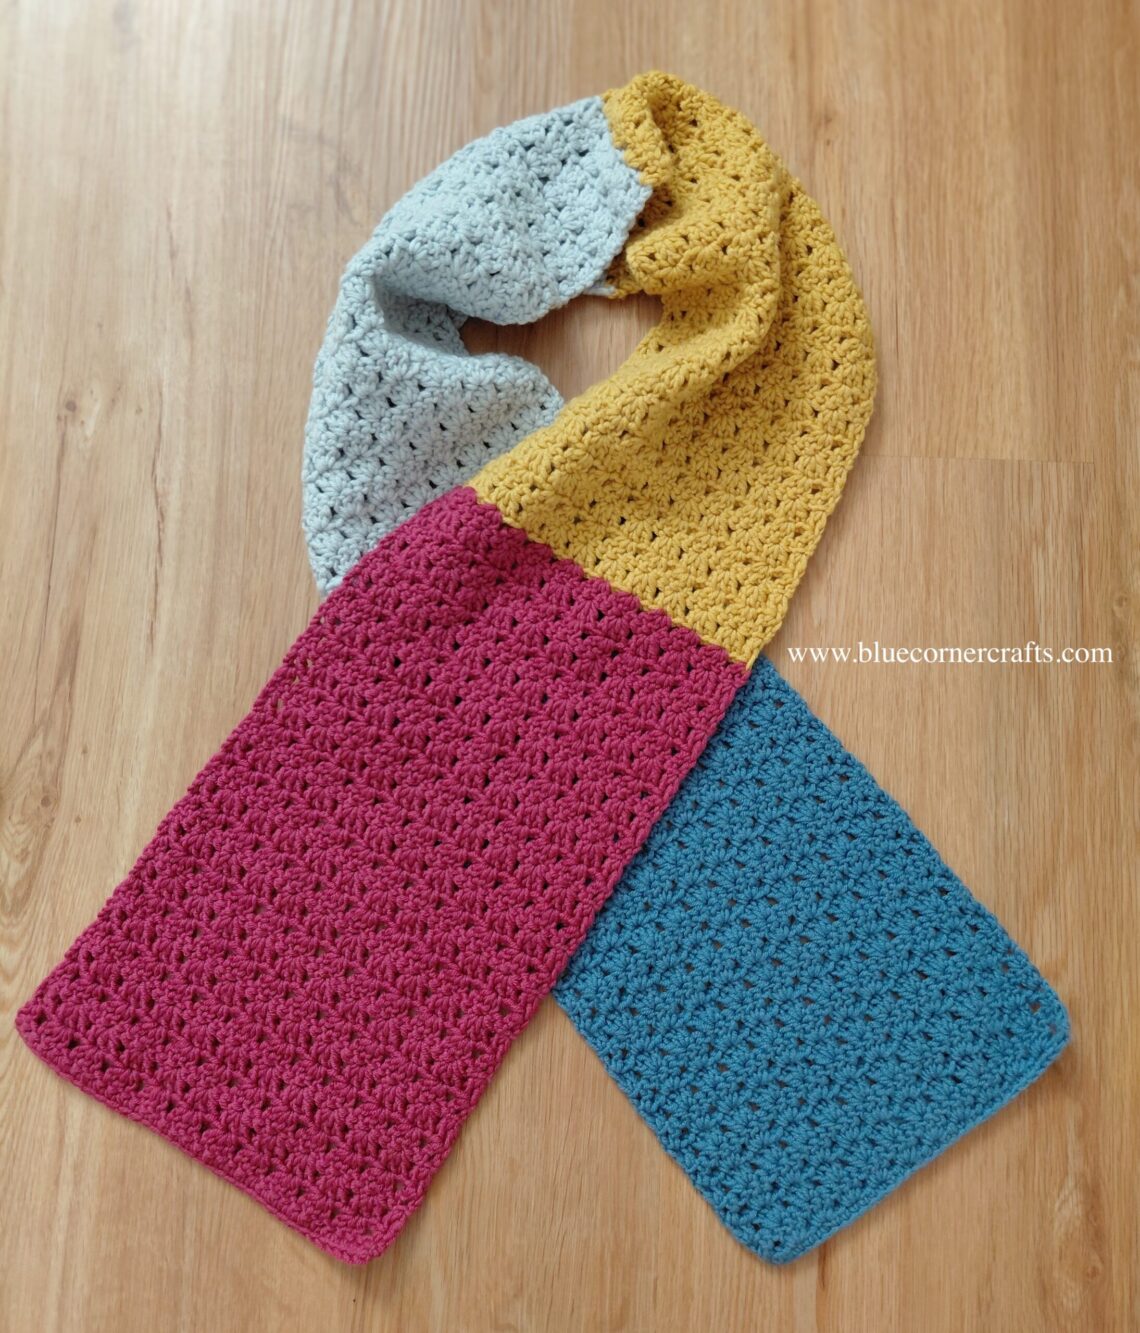
Crochet Cosy Seasons Scarf
This Cosy Seasons Scarf is one of my personal favourites and I wear it time and time again! To make this scarf I used a variation of the classic granny stitch, which is worked in clusters of three double crochet stitches and perfect for beginners. In this pattern the double crochet cluster is crocheted into the middle stitch of the cluster below it rather than in the spaces between the clusters. I feel like this slight variation gives the scarf a modern twist on the traditional granny stitch. To crochet the Cosy Seasons Scarf I used the amazing Drops Merino Extra Fine yarn in colours Mustard, Heather, Ice Blue and…
-
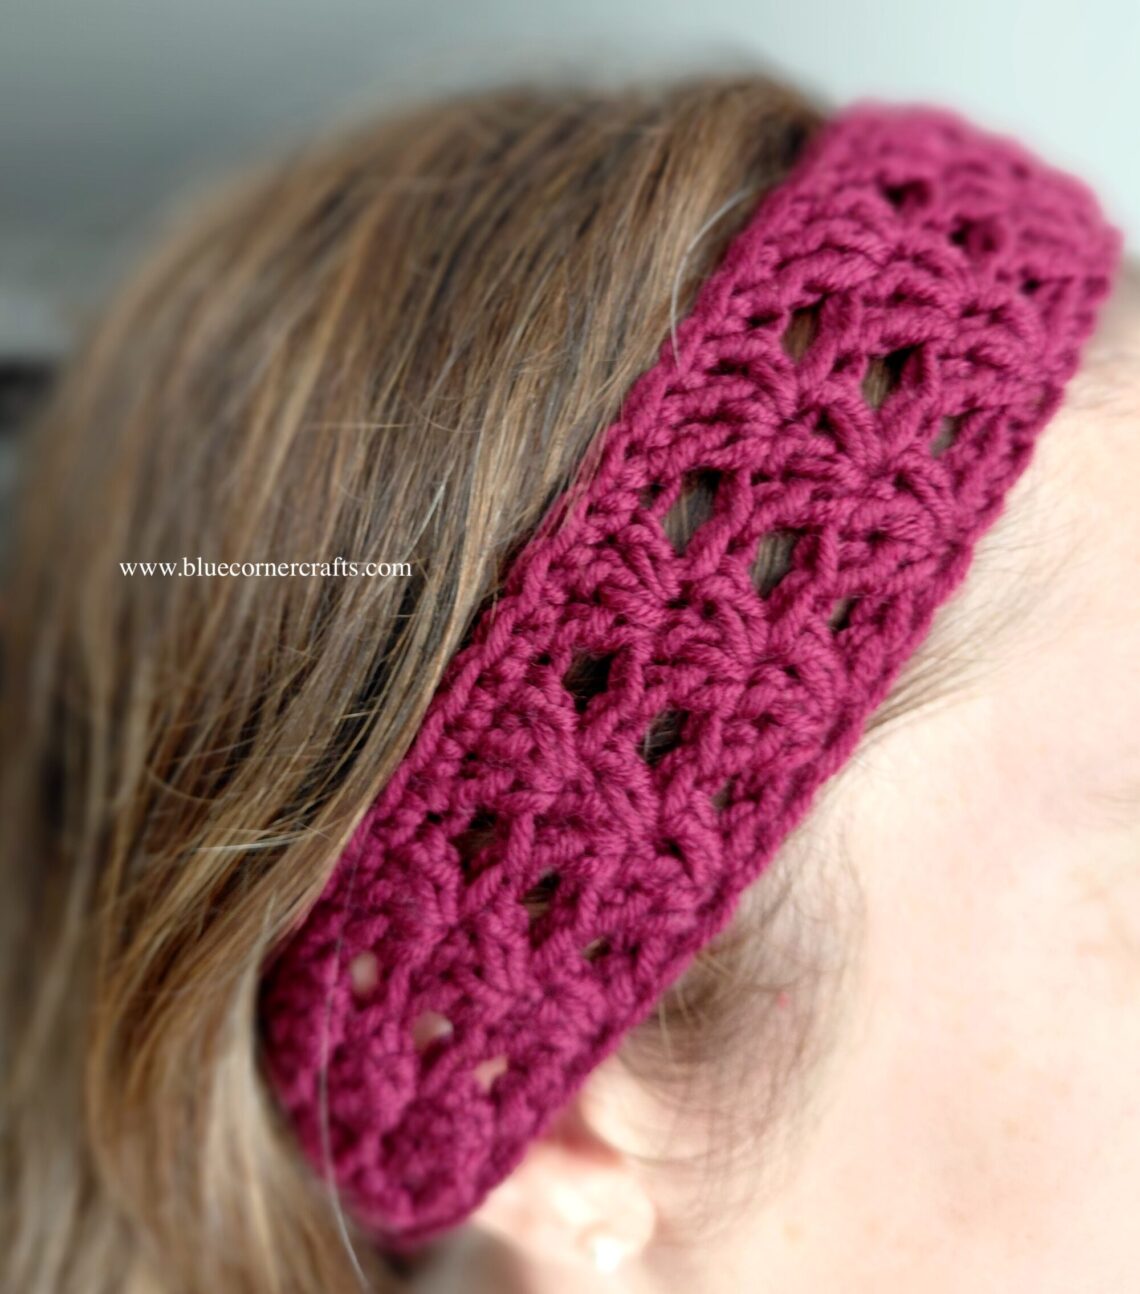
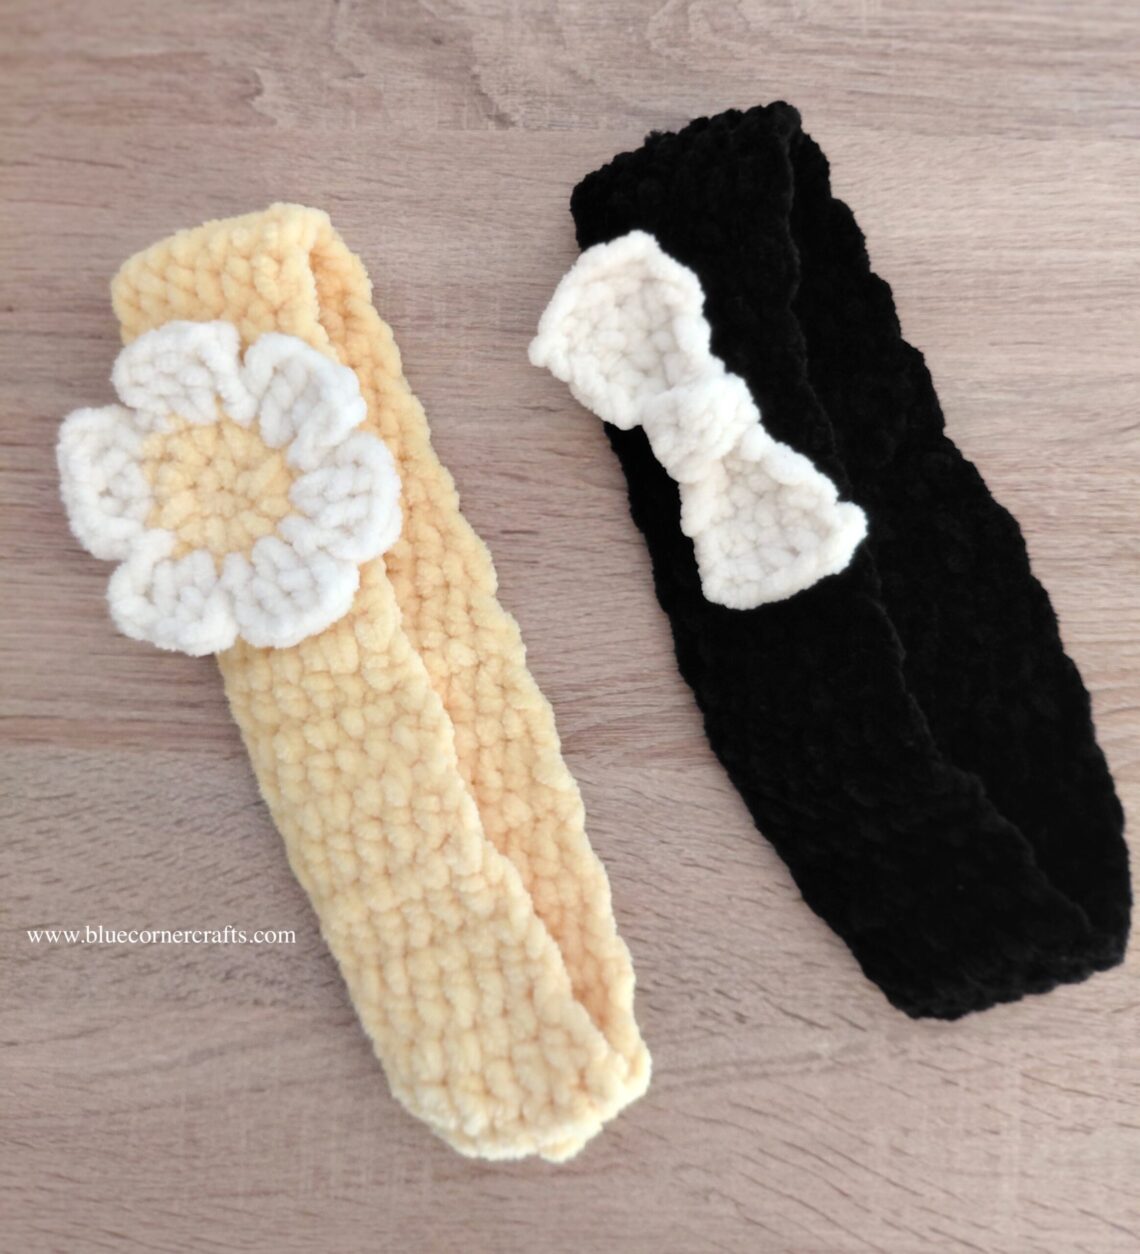
Crochet Spa Headband
Feel like a day at the spa? Or simply want to pamper yourself at home? Make these easy crochet spa headbands to wear on your relaxing day! Or use them to simply keep your hair out of way while doing your makeup. I used soft and silky velvet yarn for these headbands to give them that ‘spa’ feel…and embellished them with the classical bow and a cute flower! These headbands are easily customisable and you can make them any colour you like…the pattern below is adult size but the headband size can be adjusted for any age by varying the number of rows crocheted. With the velvet yarn these headbands…
-
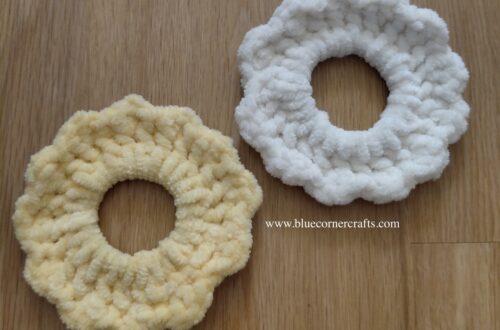
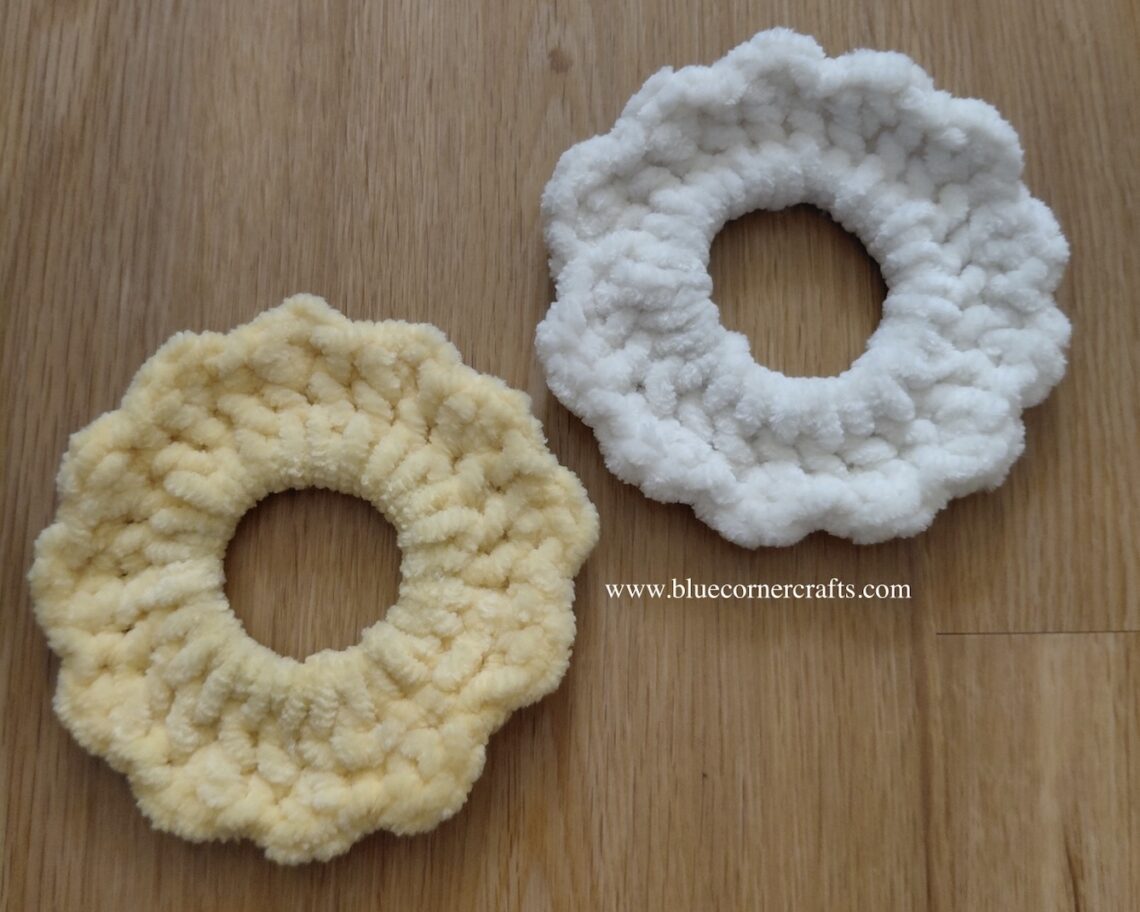
Crochet Sunshine Scrunchies
These Sunshine Scrunchies are so easy to make (just two rounds of crochet!) and can be whipped up in no time at all! They’re also a great way to repurpose some old or boring hair ties. Sunshine Scrunchies are made with velvet yarn which makes them really soft, silky and also gives them that scrunchie-like texture. They look really cute when worn and let’s just say that they were a hit with my daughters! This post may contain affiliate links. If you click a link and make a purchase, I may receive a small commission (at zero additional cost to you) which helps support this blog. I only recommend yarn…
-
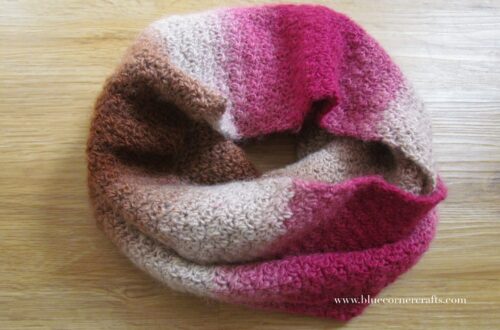
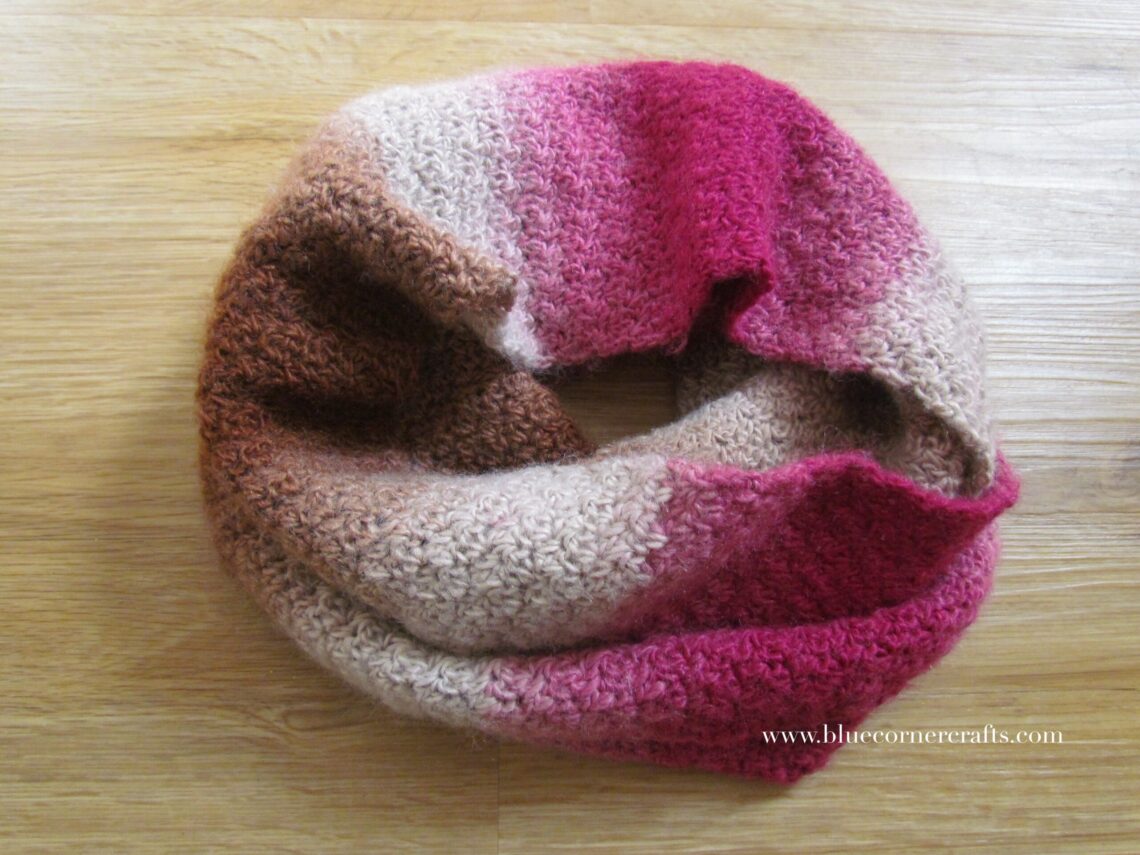
Crochet Rose Infinity Scarf
Anyone that knows me, knows that I LOVE scarves! So it seemed fitting that my first free crochet pattern should be a pattern for the Rose Infinity Scarf. This easy infinity scarf is made with just one skein of Stylecraft Dream Catcher yarn in the colour Cinnamon Rose. This acrylic DK yarn is so soft and I absolutely love the pretty colour scheme. The Rose Infinity Scarf is made entirely with a variation of the lemon peel stitch which alternates between double and single crochet stitches. The lemon peel stitch gives this scarf a lovely soft texture and makes it so cosy and perfect for a cold winter’s day! This post…