Crochet Sleepy Turtle
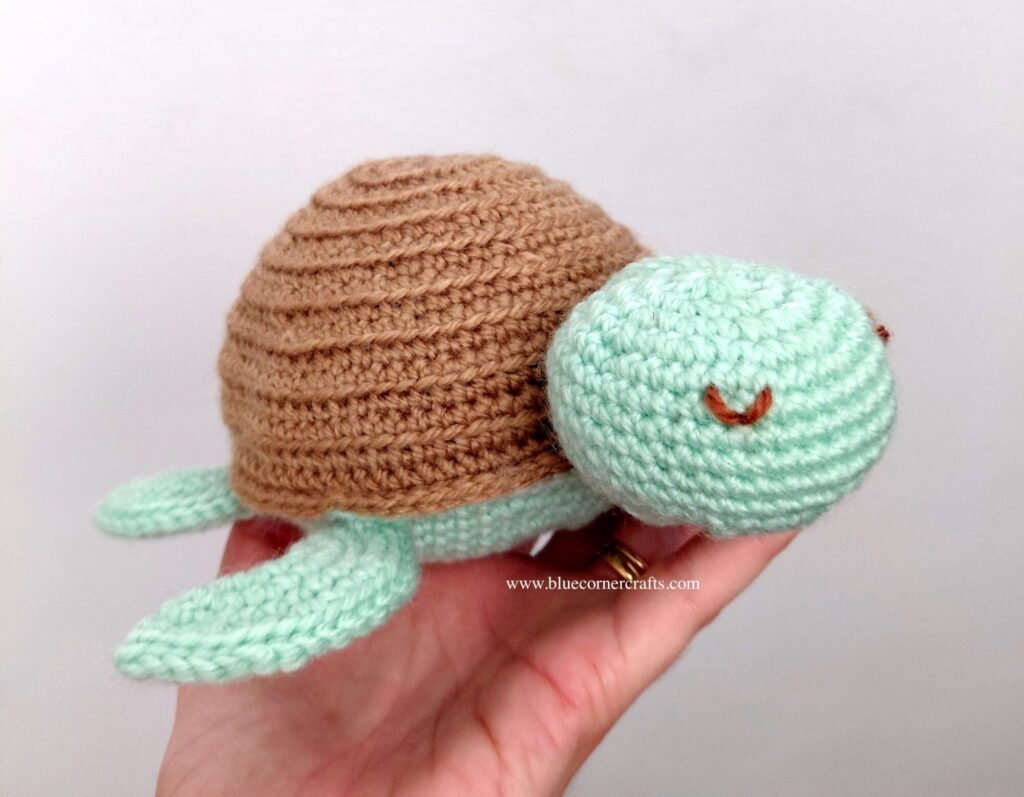
Introducing the Sleepy Turtle! I made this cute marine amigurumi as a birthday gift for a cute little boy who loves turtles 🙂 This pattern is beginner friendly and can be worked up quite quickly! I used a DK acrylic yarn to make Sleepy Turtle – unfortunately I don’t have a specific brand to share this time but any DK weight acrylic or even cotton yarn should work for this project. You could even use yarn of larger or smaller weight and adjust your hook size accordingly. Just bare in mind that the size of your turtle will vary too!
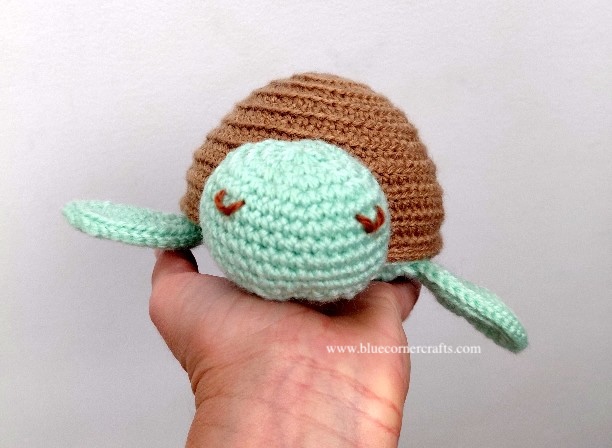
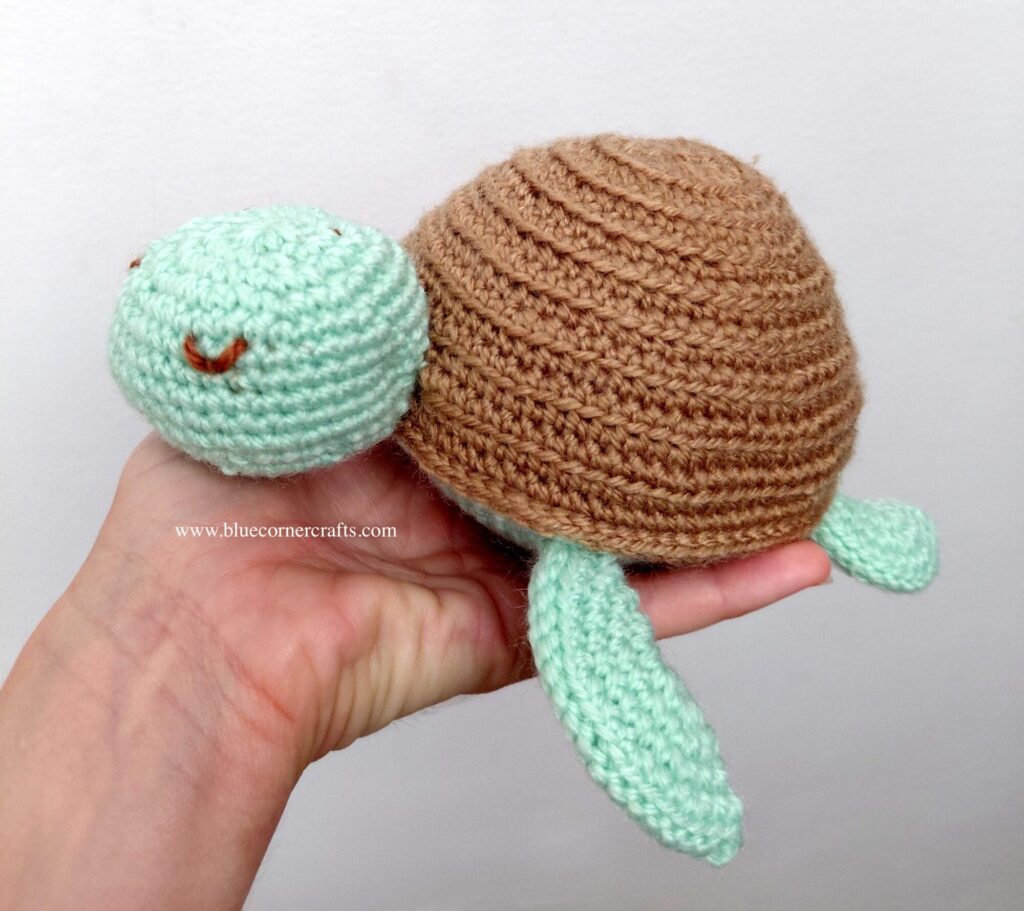
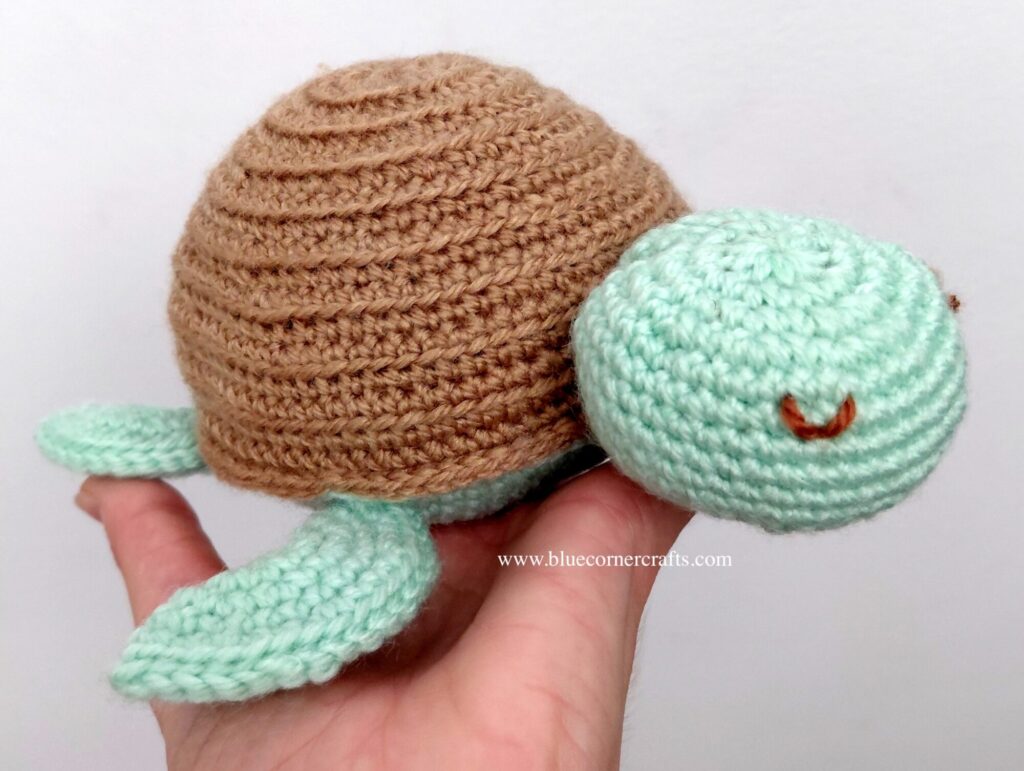
Before gifting this cute turtle I completely forgot to measure its size but as you can see in the photos it’s roughly a bit bigger than the size of my hand. If you do decide to make this Sleepy Turtle please do feel free to leave a comment below or send me a photo by email or on social media – I would love to see your creations!
This post may contain affiliate links. If you click a link and make a purchase, I may receive a small commission (at zero additional cost to you) which helps support this blog. I only recommend yarn and craft supplies that I have used myself and love!
Materials:
- DK weight acrylic yarn in brown and green (1 skein of each colour and small amount of a darker brown yarn for sewing the eyes of the turtle).
- Polyfill/Toy stuffing
- 4.00 mm (G) crochet hook
- Tapestry needle
- Scissors
Pattern notes:
- mr – magic ring
- ch – chain
- st/sts – stitch/stitches
- slst – slip stitch
- sc – single crochet
- sc2tog – single crochet 2 stitches together (single crochet decrease)
- BLO – back loop only
- FLO – front loop only
Size of turtle may vary depending on the type of yarn, hook size and tension used.
Pattern:
Head
With green yarn make a mr and ch1.
Round 1: 10sc in the mr (10 sts).
Round 2: 2sc in each st around, join and ch1 (20 sts).
Round 3: *2sc in the first st, sc in the next st, repeat from * around, join and ch1 (30 sts).
Round 4: *2sc in the first st, sc in the next two sts, repeat from * around, join and ch1 (40 sts).
Rounds 5-10: Sc in each st around, join and ch1 (40 sts).
Round 11: *Sc2tog, sc in next two sts, repeat from * around, join and ch1 (30sts)
Round 12: Sc in each st around, join and ch1 (30 sts)
Round 13: *Sc2tog, sc in next st, repeat from * around, join and ch1 (20sts). At this point start stuffing the head with polyfill.
Round 14: Sc in each st around, join and ch1 (20sts).
Round 15: Sc2tog around, join and fasten off leaving a long tail for sewing (10sts).
Round 16: Sc2tog around, join and fasten off leaving a long tail for sewing (5sts).
Using the tapestry needle sew the head shut.
Using the darker brown yarn sew the sleepy eyes on the head by making two ‘v’ style stitches at row 6 of the head (as in the photo below). With your fingers gentle tease the yarn in the ‘v’ to slightly loosen and make the eyes more ‘u’ shaped or curved.
Shell – top
With brown yarn make a mr and ch1.
Round 1: 10sc in mr, join and ch1 (10sts).
Round 2: 2sc in each st around, join and ch1 (20 sts).
Round 3: *2sc in the first st, sc in the next st, repeat from * around, join and ch1 (30 sts).
Round 4: Sc BLO in each st around, join and ch1 (30sts).
Round 5: *2sc in the first st, sc in the next two sts, repeat from * around, join and ch1 (40 sts).
Round 6: Sc BLO in each st around, join and ch1 (40sts).
Round 7: Sc in each st around, join and ch1 (40sts).
Round 8: *2sc BLO in the first st, sc BLO in the next three sts, repeat from * around, join and ch1 (50 sts).
Round 9: Sc in each st around, join and ch1 (50sts).
Round 10: Sc BLO in each st around, join and ch1 (50sts).
Round 11: *2sc in the first st, sc in the next four sts, repeat from * around, join and ch1 (60 sts).
Round 12: Sc BLO in each st around, join and ch1 (60sts).
Round 13: *2sc in the first st, sc in the next five sts, repeat from * around, join and ch1 (70 sts).
Round 14: Sc BLO in each st around, join and ch1 (70sts).
Round 15: *2sc in the first st, sc in the next six sts, repeat from * around, join and ch1 (80 sts).
Round 16: Sc BLO in each st around, join and ch1 (80sts).
Round 17: Sc in each st around, join and ch1 (80sts).
Round 18: Sc BLO in each st around, join and ch1 (80sts).
Round 19: Sc in each st around, join and ch1 (80sts). Do not fasten off.
Shell – bottom
With green yarn make a mr and ch1.
Round 1: 10sc in mr, join and ch1 (10sts).
Round 2: 2sc in each st around, join and ch1 (20 sts).
Round 3: Sc in each st around, join and ch1 (20sts).
Round 4: *2sc in the first st, sc in the next st, repeat from * around, join and ch1 (30 sts).
Round 5: *2sc in the first st, sc in the next two sts, repeat from * around, join and ch1 (40 sts).
Round 6: *2sc in the first st, sc in the next three sts, repeat from * around, join and ch1 (50 sts).
Round 7: Sc in each st around, join and ch1 (50sts).
Round 8: *2sc in the first st, sc in the next four sts, repeat from * around, join and ch1 (60 sts).
Round 9: Sc in each st around, join and ch1 (60sts).
Round 10: *2sc in the first st, sc in the next five sts, repeat from * around, join and ch1 (70 sts).
Round 11: *2sc in the first st, sc in the next six sts, repeat from * around, join and ch1 (80 sts).
Round 12: Sc in each st around, join and ch1 (80sts). Fasten off and weave in the ends.
Shell – Assembly
Place the top part of the shell on the bottom part and using the brown yarn use slip stitches to join the two parts together (when you are half way through closing, start stuffing the turtle shell as you go). Both parts of the shell have an equal number of stitches (80 sts) on the outer edges so the two parts can easily be joined together with slip stitches. Alternatively you can always sew the two parts shut with the yarn and tapestry needle. Once the turtle shell is completely stuffed and closed, fasten off and weave in the ends.
Front legs (make two)
With green yarn make a mr and ch1.
Round 1: 10sc in mr, join and ch1 (10sts).
Round 2: 2sc in each st around, join and ch1 (20 sts).
Round 3: *2sc in the first st, sc in the next st, repeat from * around, join and ch1 (30 sts).
Round 4: Sc in each st around (30 sts)
Round 5: *2sc in the first st, sc in the next two sts, repeat from * around, join and ch1 (40 sts). Do not fasten off.
At the ch1 with hook attached, fold the circle made down the middle to make a semi-circle (the turtle leg). Then sl st around to close the circle, only crocheting through the BLO of the ‘top half’ and FLO of the ‘bottom half’ of the semi-circle. Fasten off, leaving a long tail for sewing the legs onto the shell. If you prefer you can always simply sew the legs shut with the yarn and tapestry needle.
Back legs (make two)
With green yarn make a mr and ch1.
Round 1: 10sc in mr, join and ch1 (10sts).
Round 2: 2sc in each st around, join and ch1 (20 sts).
Round 3: *2sc in the first st, sc in the next st, repeat from * around, join and ch1 (30 sts).
Round 4: Sc in each st around (30 sts)
Similarly to the front legs of the turtle, fold the circle in half and close the semi-circle with sl sts or simply sew shut. Leave a long tail for sewing.
Tail
With green yarn make a mr and ch1.
Round 1: 6sc in mr, join and ch1 (6sts).
Rounds 2-4: Sc in each st around and join (6 sts).
Fasten off leaving a long tail for sewing.
Assembly of the Sleepy Turtle:
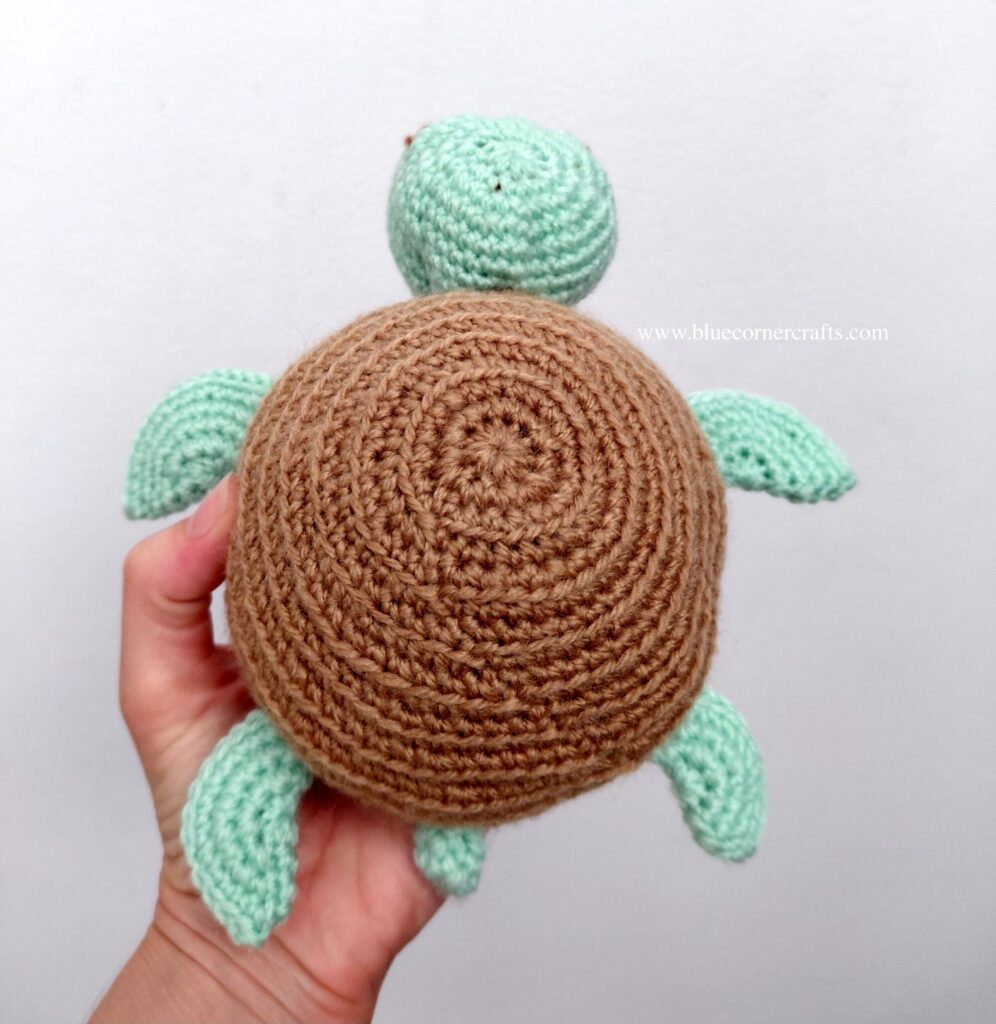
Sew the head of the turtle on the brown part of the shell (as in the photos above).
Sew the tail on the bottom green part of the shell right at the opposite end of the turtle head.
Sew the front and back legs on the green bottom part of the shell, just below the top brown shell.
Every effort has been made to ensure this pattern is accurate and easy to follow. If you have any questions, need clarification on a stitch, or spot a typo, please drop me a comment below or send me an email. I promise to get back to you asap and if needed, update the pattern immediately so you can get back to crocheting without any delay!


You May Also Like
Crochet Spa Headband
Crochet Sparkly Nights Out Scarf